Within this guide, we aim to outline and demonstrate how you can access your Virtual Server via our Rescue Mode (Rescue System) for recovery purposes.
1. You must firstly navigate to your control panel, then your server; you can see more information on accessing your control panel by clicking here. Navigate to your server via the right-ward facing arrow.
Command Line Rescue System
1. We offer two forms of Rescue Systems, our focus for this section will be on our Command Line rescue system; navigate to the 'Rescue Mode' navigation option.
2. You may now entered your temporary desired password in order to access the Rescue Mode system via SSH/SFTP, make sure both inputs are identical then click 'Enable Rescue Mode'.

3. You may restart your server using the restart option; provide such around five minutes to restart into the Rescue System, you can now connect via SSH/SFTP; click here for guidance on this. Your details for this will not be the same as usual, the username will be 'root' and the password will be the one specified above.
4. We'll now demonstrate to you what you can do with this Rescue System, please now scroll down to the 'Toolkit Guidance' section of this article for further details.
Graphical User Rescue System
1. We offer two forms of Rescue Systems, our focus for this section will be on our Graphical Interface rescue system; navigate to the 'Settings' navigation option followed by 'VPS Configuration'.
2. You wish to select the '1) CD Drive 2) Hard Disk' option from the 'Boot Order' drop-down, followed by 'rescue-debian-11.iso' from the 'Select ISO' drop-down as displayed below.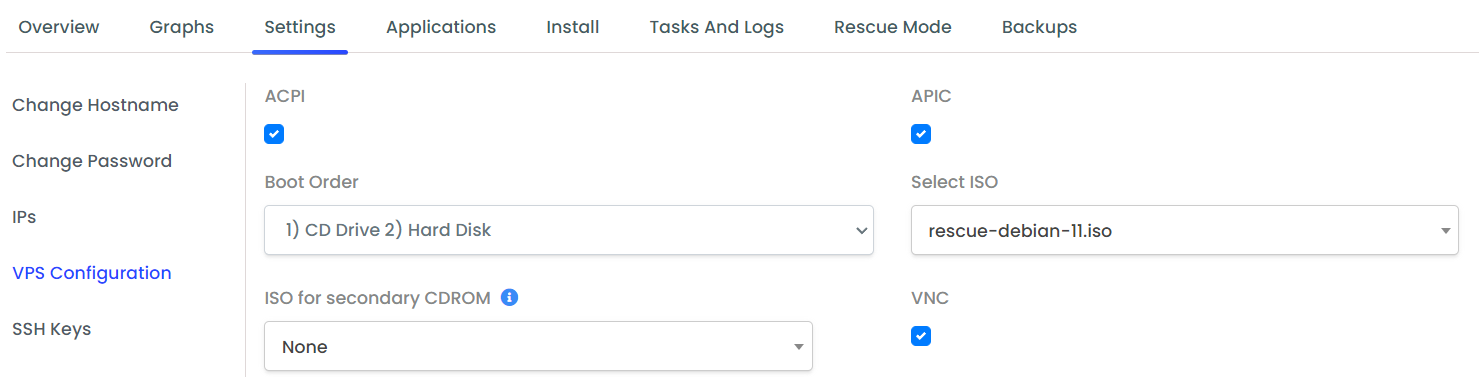
3. You then need to click 'Submit', once complete restart your server using the restart option; provide such around five minutes to restart into the Rescue System.
4. Once this time has passed, navigate to the 'VNC' option which appears like so: ![]() Select 'Launch HTML5 VNC Client' and you will be redirected to a view of your server like you are in front of a machine.
Select 'Launch HTML5 VNC Client' and you will be redirected to a view of your server like you are in front of a machine.
5. From the 'Main Menu' select 'Debian GNU/Live Linux' by pressing 'Enter', the rescue system will begin to launch; simply wait until you are displayed with a desktop environment.
6. Once a desktop environment has appeared, open a Terminal window using the following option then execute the command 'sudo su' to enter the root (administrator) account: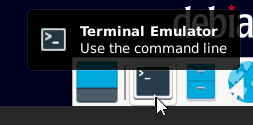
7. We'll now demonstrate to you what you can do with this Rescue System, please now scroll down to the 'Toolkit Guidance' section of this article for further details.
Toolkit Guidance Command Explanation
1. We can now get started with using our rescue systems now you're into such; we first need to mount our disk where our data is located, we first need to find the mountpoint via the command 'fdisk -l':
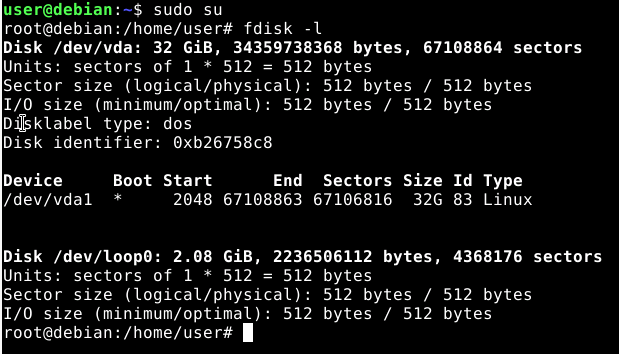
2. We can locate the mountpoint of the disk usually by it's capacity; in this case we've got a VPS Classic XS with a 32GB disk so we're looking for this capacity hence our mountpoint is '/dev/vda1'. Our mountpoint should always have some form of number at the end as without such is the raw device, with such is our partition which is what we are attempting to mount.
3. Once we have our mountpoint, we need to mount the device; this can be done via the command: 'mount <mountpoint e.g. /dev/vda1> /mnt/' (the /mnt/ directory will already exist); to make sure we're executing commands as our operating system usually installed not our Rescue System we use the command 'chroot /mnt/'; neither of these commands should display an output, you should see a change in directory in some cases when you run the second command:
3. As we're mounted and chrooted into our data; we can easily modify our data, for example update our usual root password (not rescue root password) via the command: 'passwd'.
4. If you are using our Graphical User Rescue System you can make use of the File Explorer to go to the folder '/mnt/' to access your service data, for our Command Line system; this isn't an option.
5. You can now use the commands such as 'nano' or 'vi' to modify your configurations (e.g. networking configurations) or backup your data (best to use Command Line rescue for backups).
